The idea with EasyPractice is to make it possible for anyone to get their very own clever online booking form. Clients will be able to make appointments as soon as online booking is installed. And, because EasyPractice is integrated with Google Calendar and iCal, you’ll have an ‘all in one’ solution for your practice 🙂
Here is a short guide for setting up your online booking form in EasyPractice.
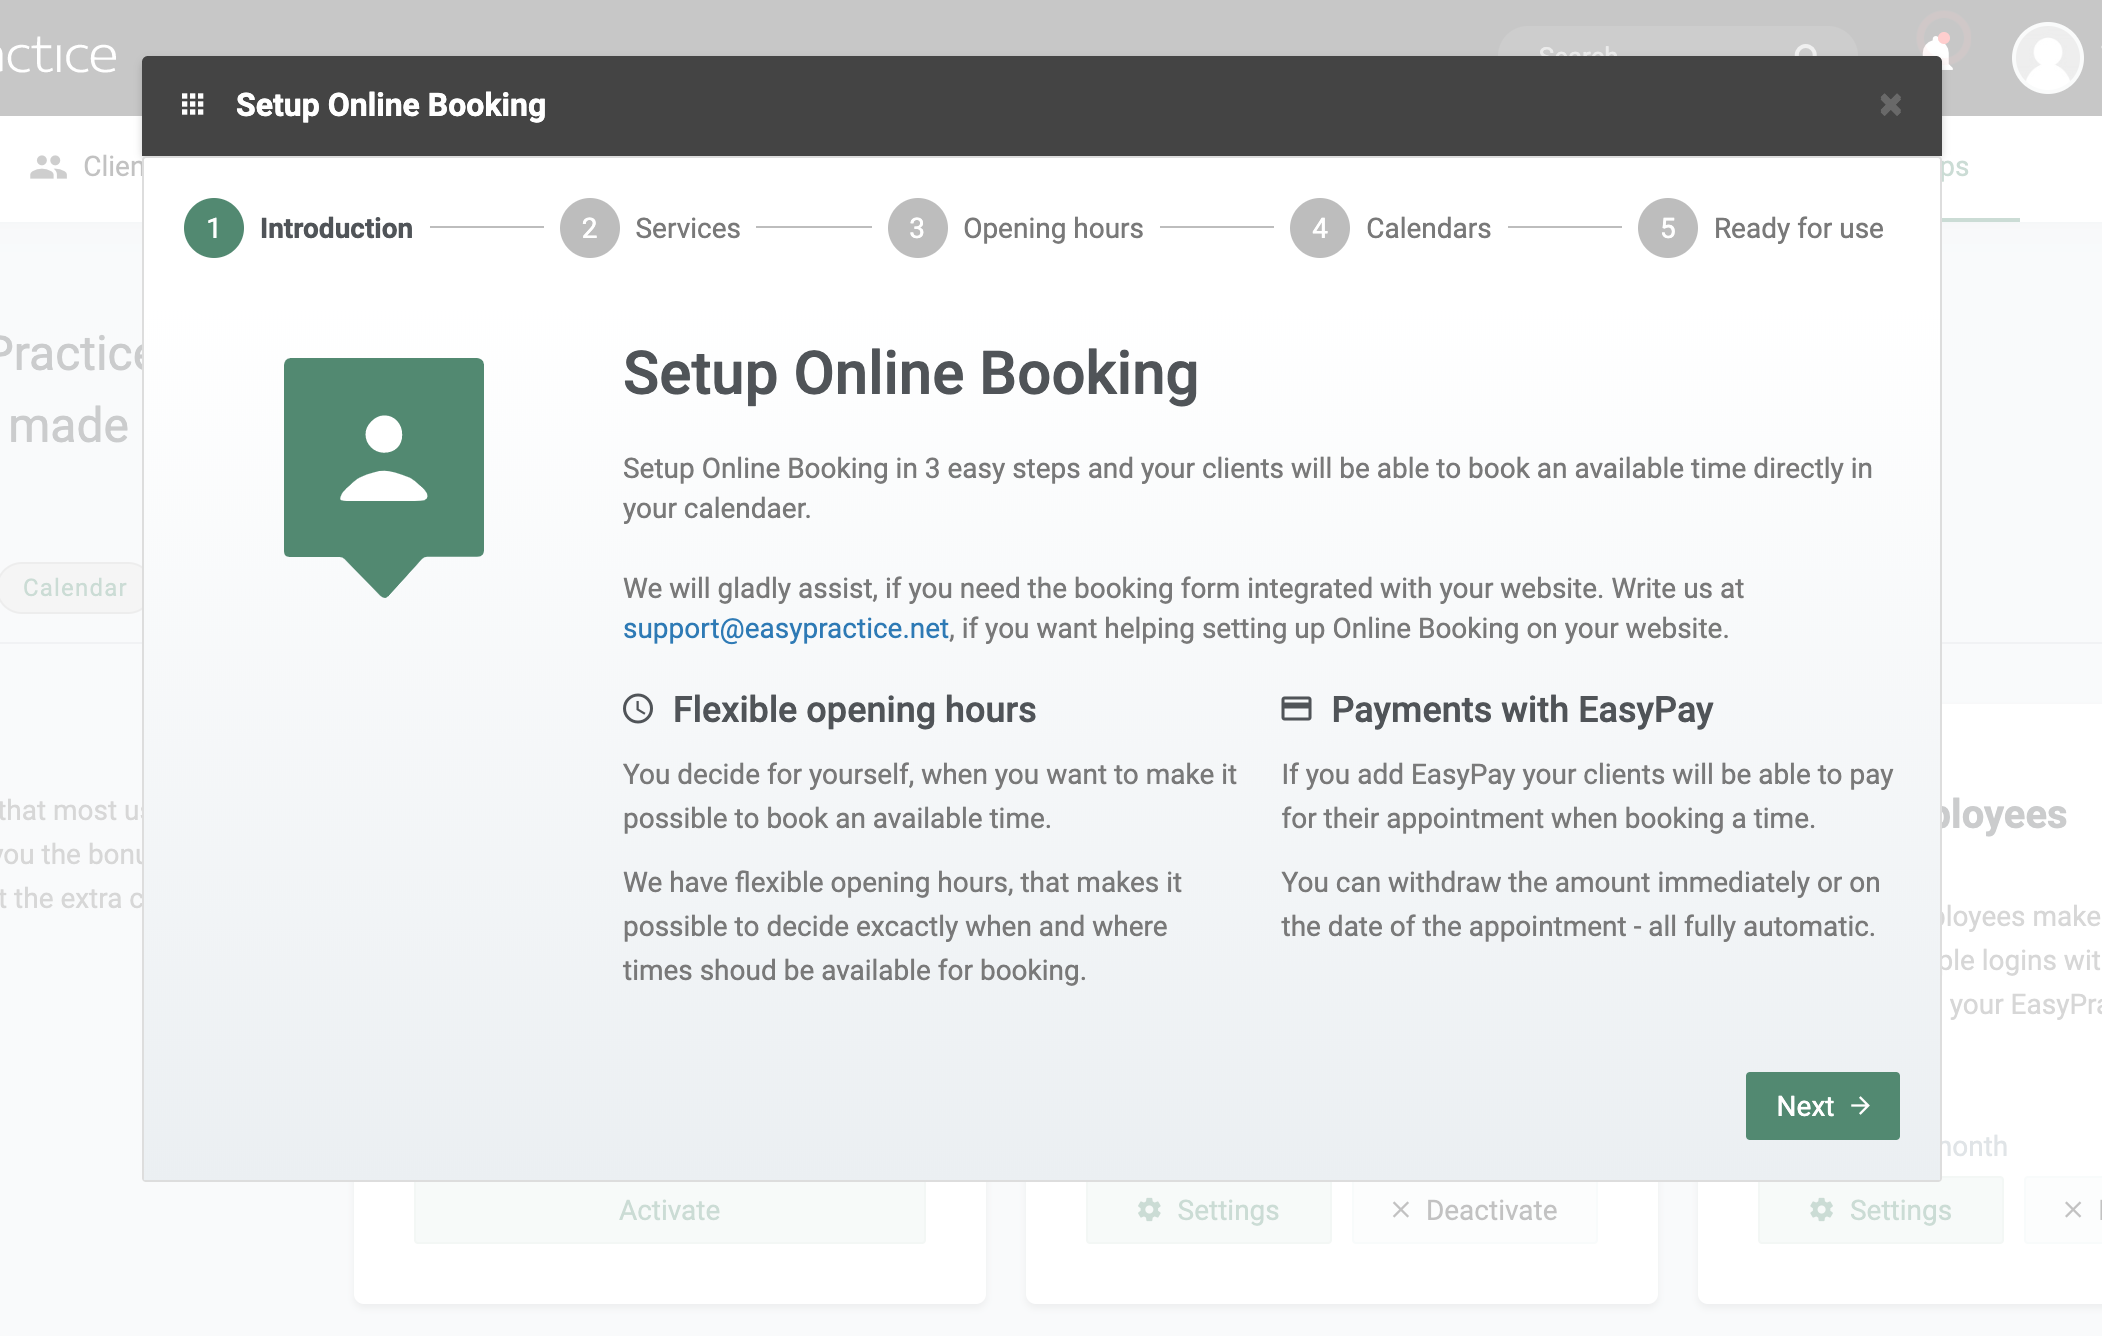
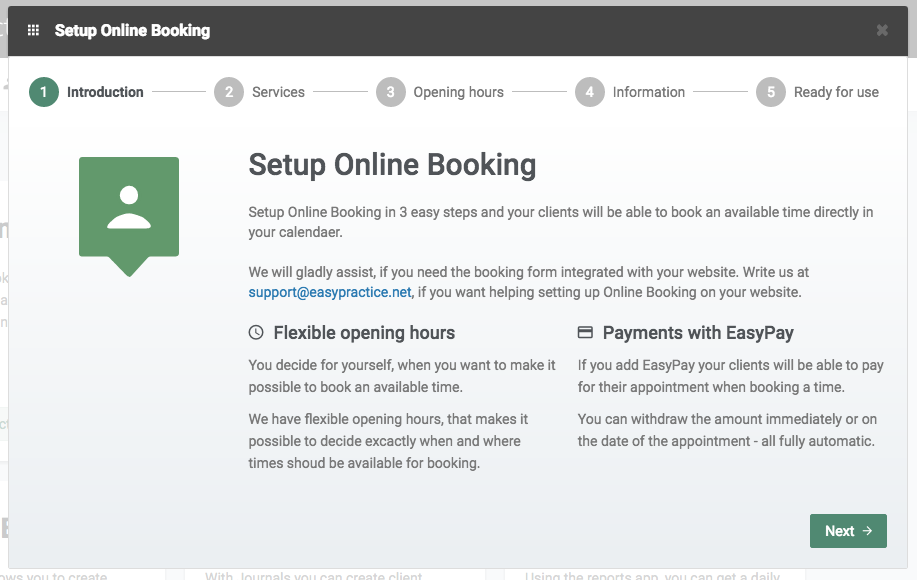
Step 1 – Introduction
When you’re logged in to the system then go to ‘Apps’ in the menu and activate ‘Online Booking’. When doing so a pop-up window will appear and guide you through the set up.
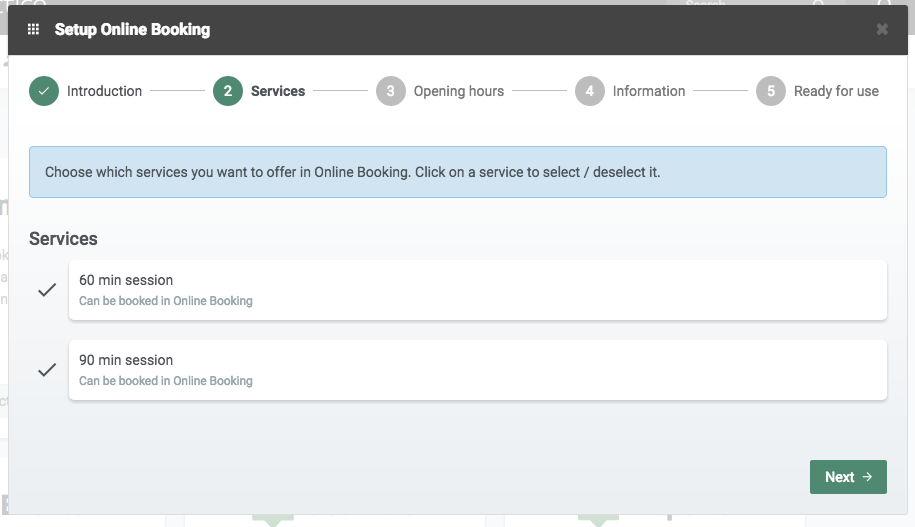
Step 2 – Services
If you haven’t registered any services yet, you’ll have to do that first. Just click the link and go back to the section ‘Set up Online Booking’ when you’ve finished. Choose which services you’d like to have in your online booking form.
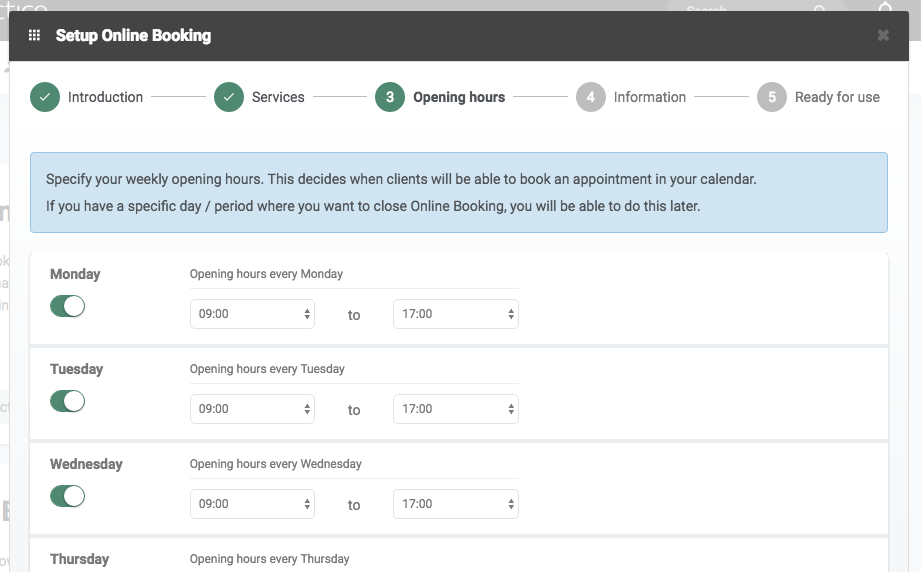
Step 3 – Opening Hours
In this step, you’ll define your daily opening hours. It may be that you as a therapist offer different services on different premises. Then you can easily add the individual services to each specific location (calendar). For example, if you spend the first two days a week at one clinic and the remaining three days at another, or maybe you want to stay open on a Saturday of a particular week. Then you can adjust the opening hours for each calendar so that clients do not book an appointment in the wrong place at the wrong time.
It’s within these hours that your clients can book an appointment with you. If you’d like to turn off Online Booking during a specific day or period, you’ll be able to do that later on. If you’d also like to have more than one active calendar connected to your booking form, you’ll also be able to do that after the setup.
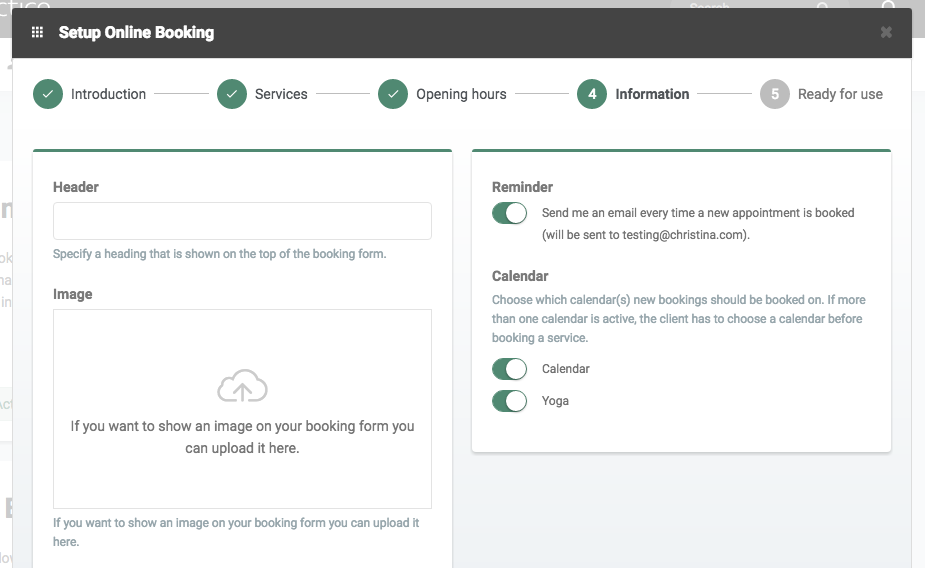
Step 4 – Information
The last thing you’ll need to do, is to write a header, and, if you like, you can upload your company logo and choose whether or not the system should automatically notify you of new bookings. There are a number of options available in terms of the appearance and design of your Online Booking. You can, for example, add a logo to your Online Booking, choose the order of the booking process, and add a map showing where you are located. Most of these settings can be found under ‘Settings’ –> ‘Online Booking’ –> Appearance.
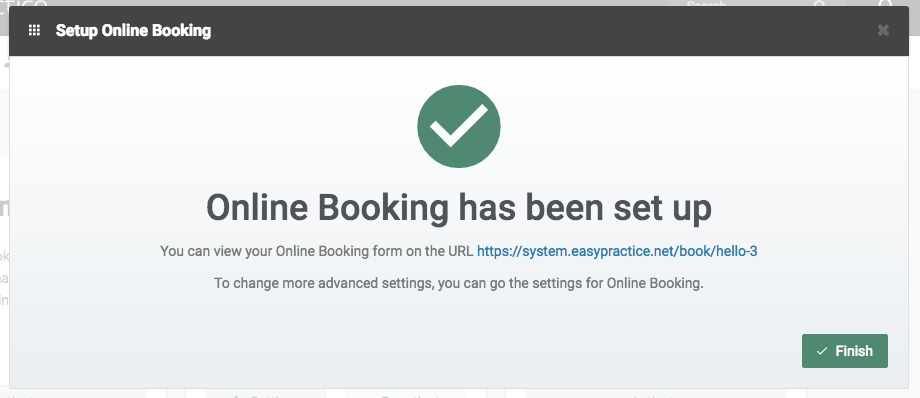
Step 5 – Done!
This is our example of what an online booking form might look like:

An example of a booking form
Go to the blog post ‘Three ways to insert an online booking form on your webpage‘ to read how to insert the online booking form to your website.
In our Help Centre we have a whole section dealing with our Online Booking Function.
If you have any questions or comments, please get in touch at [email protected] and we’ll get right back to you! ? If you wish to try out our booking system free of charge to see if it works for you!
 alt Online scheduling
 alt Create special Vouchers for your services
 alt Prague by night